Loops are very common when you are programming. They are used to iterate through a list or array or run until a certain condition has been reached. There are different kinds of loops and this time I want to show you all about the do-while loop with C#.
Table Of Contents
What is the Do-While loop?
The do-while loop is a loop that continues executing code until a certain condition has been met. It’s like a normal day-to-day thing: Keep drinking until you are not thirsty anymore. In this, the keep drinking is the execution, and the until not thirsty is the condition. The specified condition needs to be true.
The buildup of a while loop in C# is always the same:
- It starts with do
- Then you specify the condition at the end with a while
- You write the code to execute as long as the condition is true
- The execution of the code stops when the condition is false
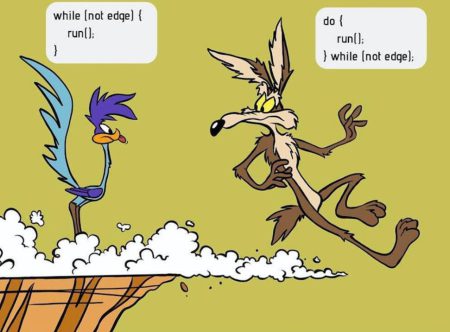
It looks like a while, but a do-while executes the code block at least once. A good example is the image below, where the while stops in time and the do-while runs over the edge.

The code below is the default implementation of a do-while.
do
{
    // Your code here
} while (true);
Examples
Below are some examples that show how the do-while loop with c# works. These should give you some idea about the working of the iteration and how you can loop until a certain condition is met.
Basic example
The first example will write “Executing…” in a console application until the variable run is false. This variable is changed when the value of the variable i is greater than 10.
int i = 0;
bool run = true;

do
{
    Console.WriteLine("Executing...");

    i++;

    if (i > 10)
        run = false; // Run is set to false, to this will stop the While loop

} while (run);
This will show 11 lines of “Executing”. The code below would be better or shorter, just the way you look at it:
int i = 0;

do
{
    i++;
    Console.WriteLine(i);
} while (i < 10);
This will do the same, but the code will print the value of i as long as the value of i is smaller than 10.
Stopping / Break
In some cases, you might want to stop or abort the for loop before the condition is met. You can do this with a break. In the example below, the while loop will stop as soon as i equals 5.
int i = 0;

do
{
    i++;

    if (i == 5)
        break;

    Console.WriteLine(i);
} while (i < 10);
We use a break when there is no point in continuing the do-while loop with c#. In the case of the example, the do-while loop completely stops when the value of i is 5.
In a real-life situation, you can use the break when a problem hits or you already achieved what you want to do. Breaking a do-while loop is a good idea if the remaining iterations have no point of being executed.
Next iteration / Continue
In some cases, you want to skip some of the code and continue to the next run/iteration. This can be achieved by using the continue. In the example below, the number 5 won’t be printed on the console.
int i = 0;

do
{
    i++;

    if (i == 5)
        continue;

    Console.WriteLine(i);

} while (i < 10);
This is a bit similar to the break, but with continue the do-while stops executing the current iteration and hops on to the next.
Conclusion On The Do-While Loop With C#
You will encounter the do-while loop a lot. It’s one of the most used loops to iterate through data. It always starts with do, has a body with code, and it ends with while that has a condition that tells when the do-while should stop.
You can completely stop a do-while by using the break. But if you just want to skip to the next iteration, you can use the continue.


